Guides › Time and HR
Forms and approvals
Fill in a form – a course application, a purchase, access to a system – and follow it until it is approved and done. The form goes to the right approvers by itself, step by step.
What the module does
With Forms you replace paper forms and emails with forms on the intranet:
- Employees fill in a form and can follow it under My forms.
- The form goes through up to six approval steps – for example the manager and then HR.
- When it is approved, it goes to the recipients, who carry out the task and mark it as Carried out.
- All steps, decisions and comments are shown in the history.
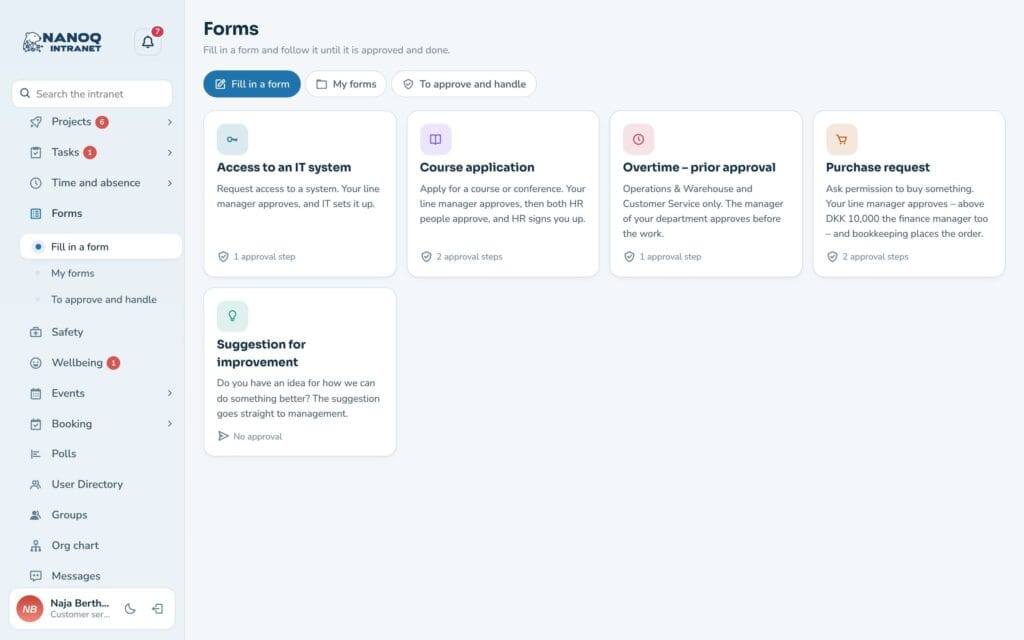
The module is off until an administrator turns it on. At the top of the form pages are the tabs Fill in a form, My forms, To approve and handle and – for those who may build forms – Manage forms.
Fill in a form
- Click Forms in the menu – the Fill in a form tab shows the forms you can fill in.
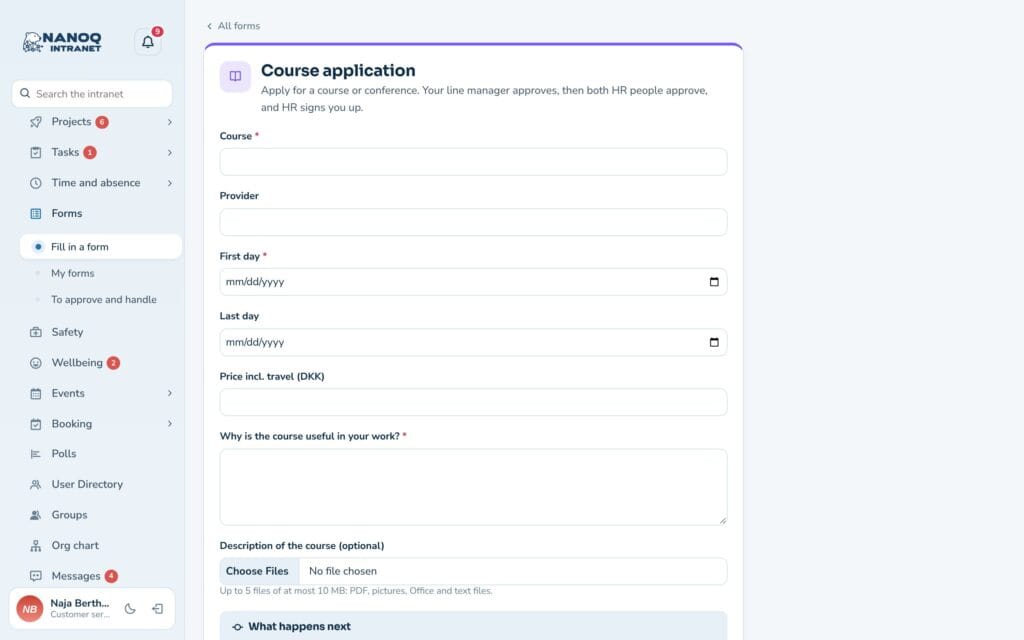
- Click the form and fill in the fields. Fields marked * are required.
- Under What happens next you can see who must approve – by name – and who carries out the task afterwards.
- Click Send for approval.
If the form has no approval steps, it is registered straight away and goes directly to the recipients.
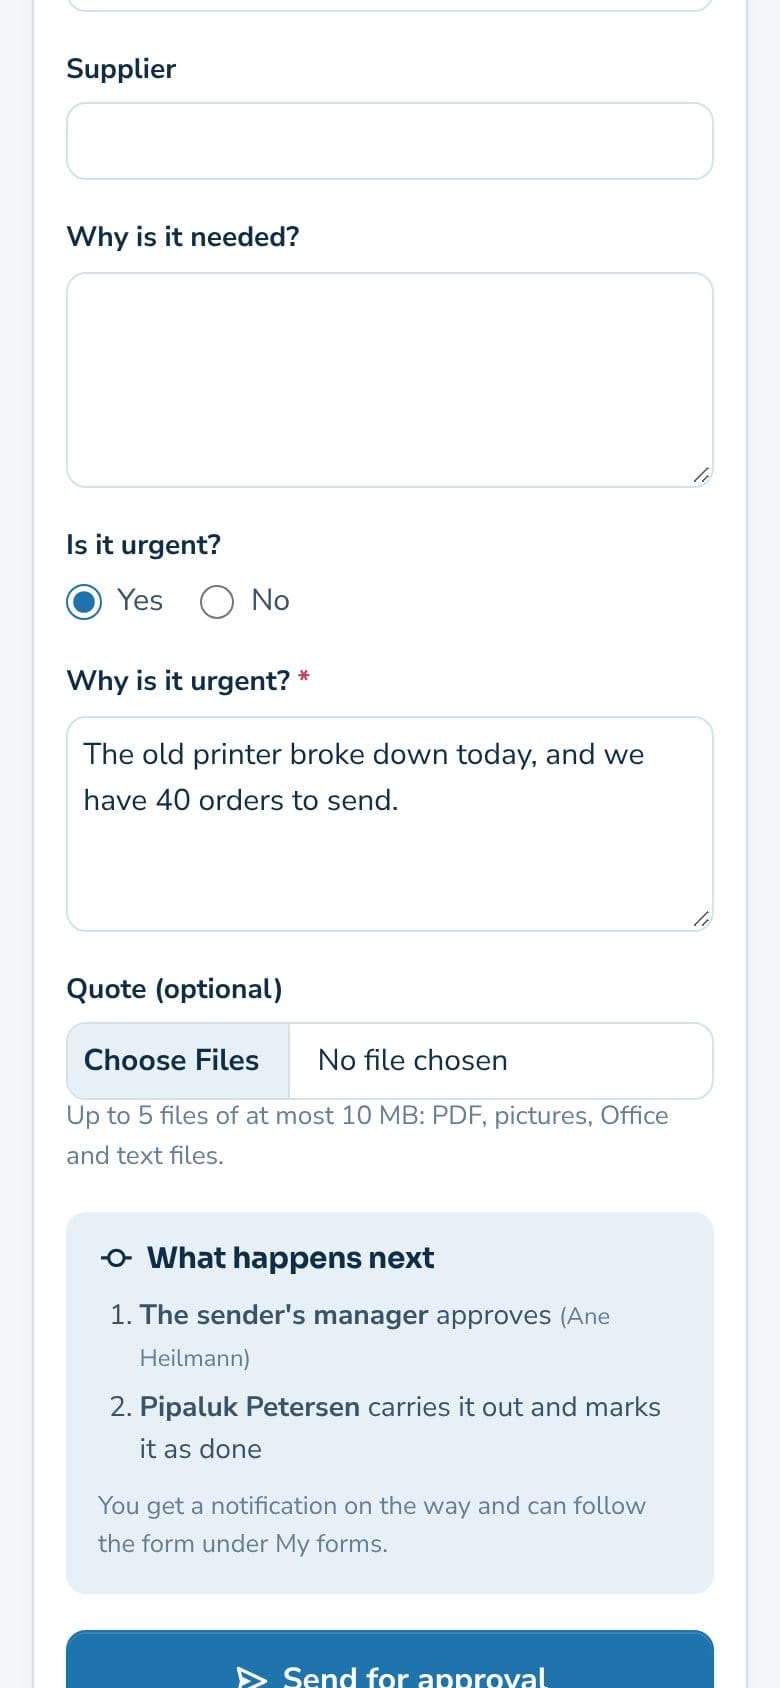
On the phone
Forms work on the phone too – the fields are listed below each other, and you can attach a photo straight from the camera where the form has a file field.
Follow your form
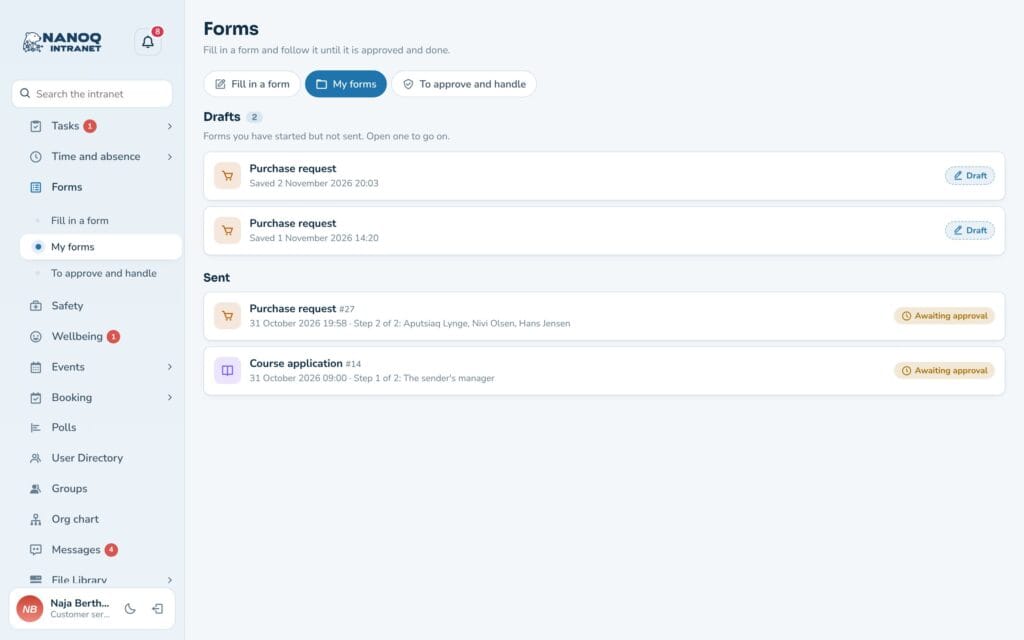
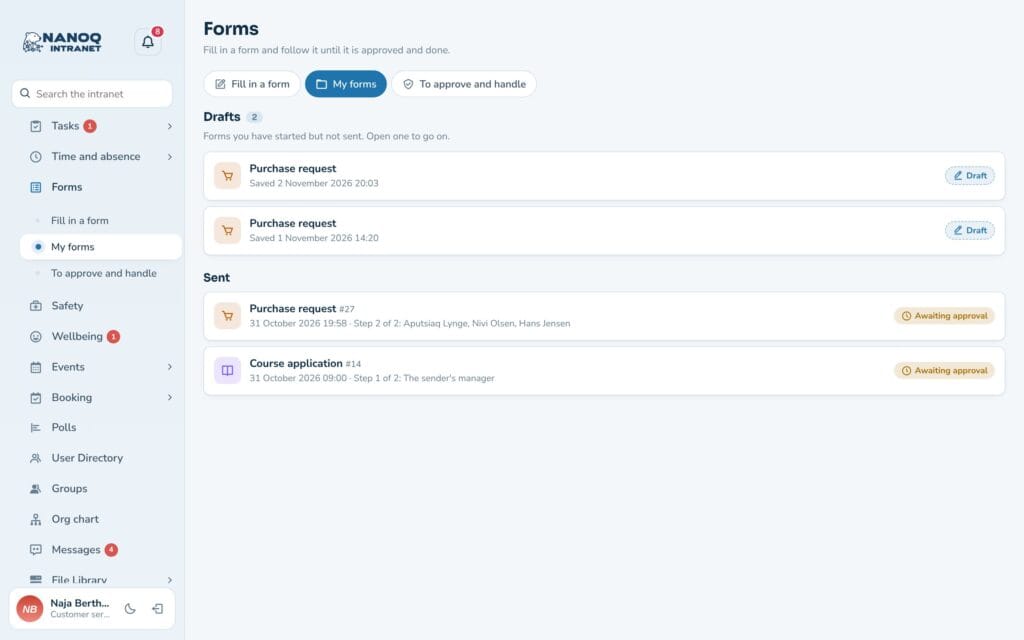
Under My forms you see everything you have sent, with status:
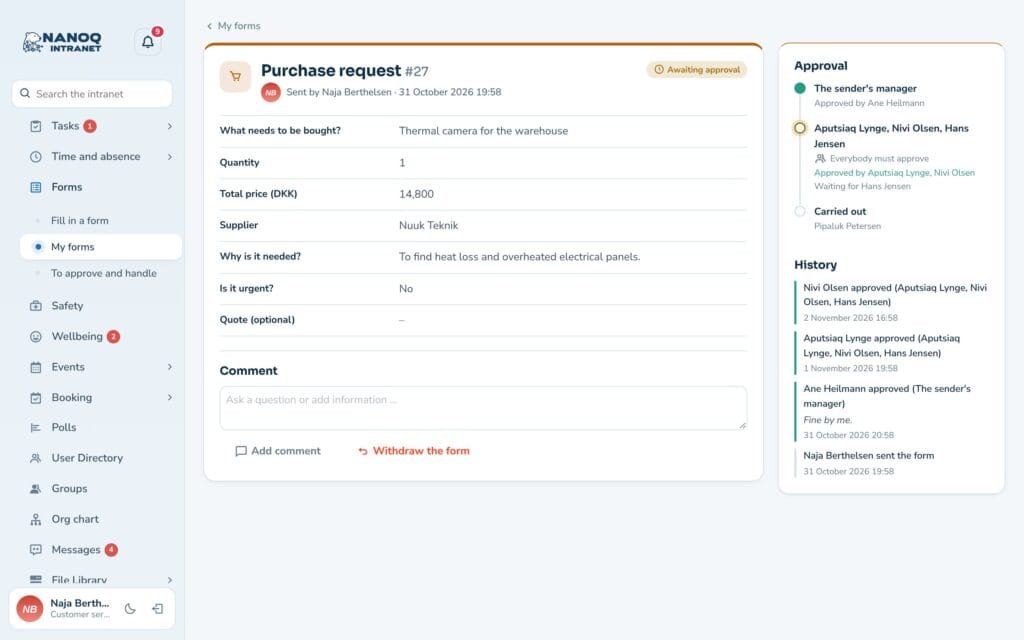
- Awaiting approval – and which step it has reached.
- Approved – waiting for the recipient to carry out the task.
- Carried out, Rejected or Withdrawn.
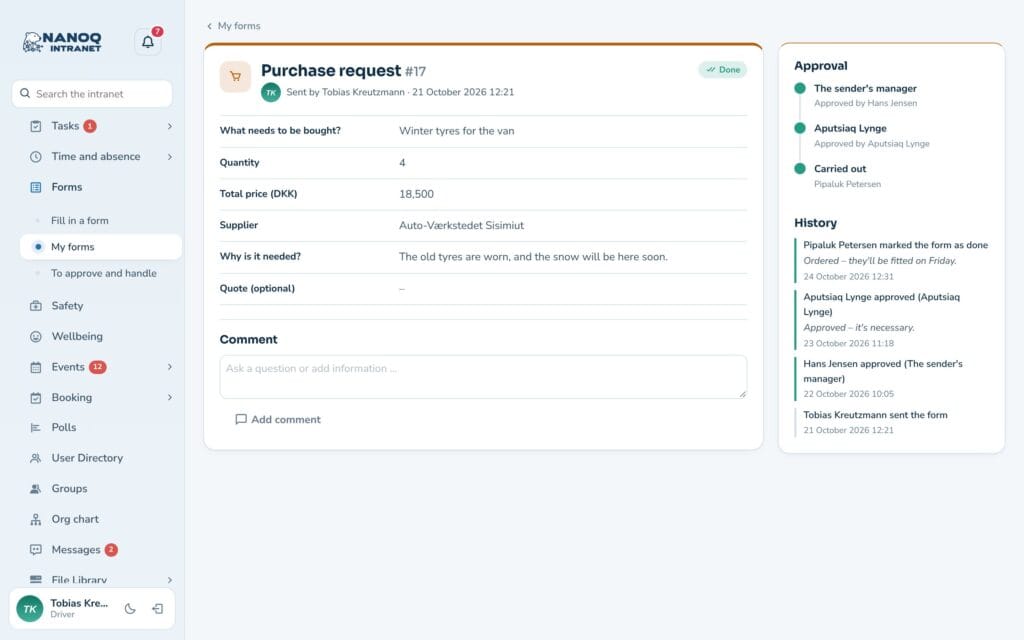
Click a form to see your answers, the approval steps and the history. Under Comment you can ask a question or add information. As long as the form is awaiting approval, you can Withdraw the form. You are notified under the bell when something happens.
Drafts and Correct and send again
While you fill in a form, what you write is saved as a draft. Click Save draft to also save attached files, and finish the form later under My forms.
If a form is rejected – or you have withdrawn it – click Correct and send again. The fields are already filled in, so you only need to correct what is missing.
Approve or reject
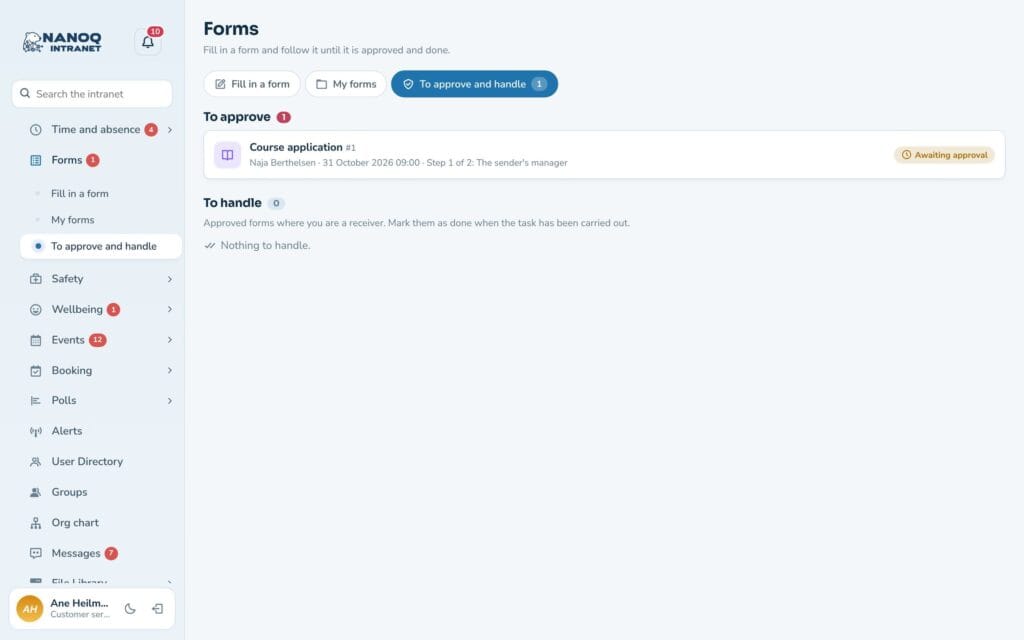
If you need to approve, you are notified, and the form is under To approve and handle → To approve.
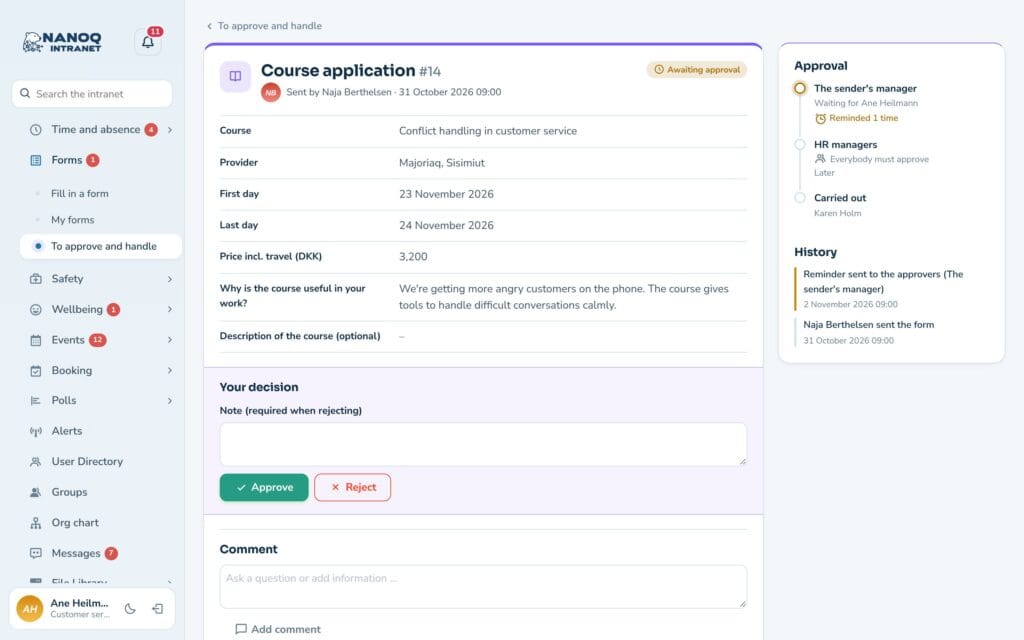
- Open the form and read the answers.
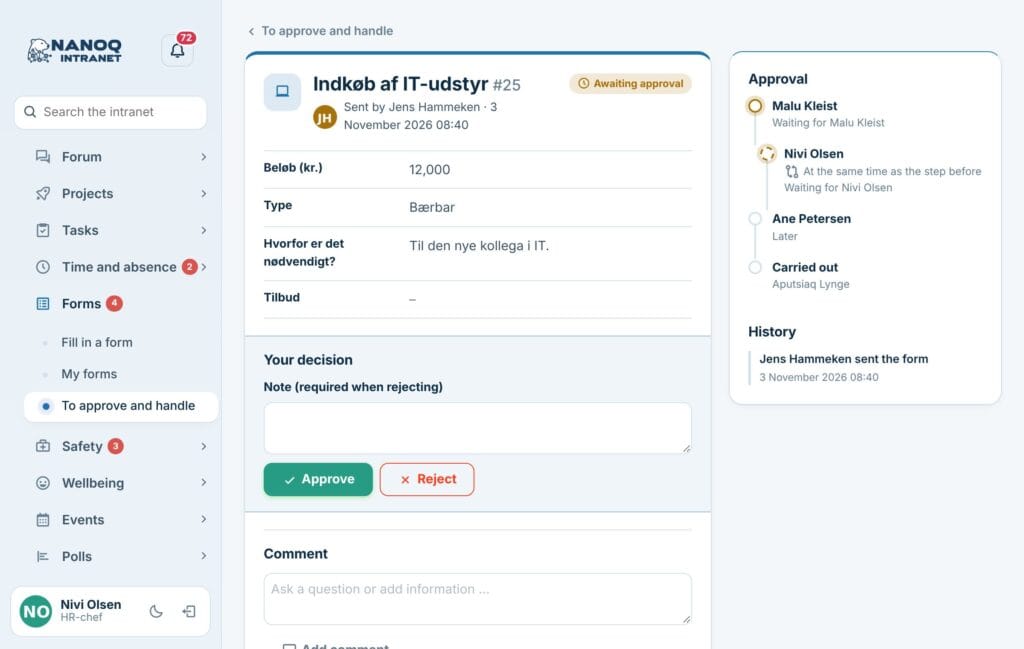
- Optionally write a comment – it is required if you reject.
- Click Approve or Decline.
In each step it is enough that one of the approvers decides. When a step is approved, the form moves on to the next step. Nobody can approve their own form – then it goes to the next in line.
Carry out the task
The recipients – for example the buyer or IT – find the approved forms under To handle. When the task is done, open the form, optionally write a Note to the sender and click Mark as done. The sender is notified.
Build a form
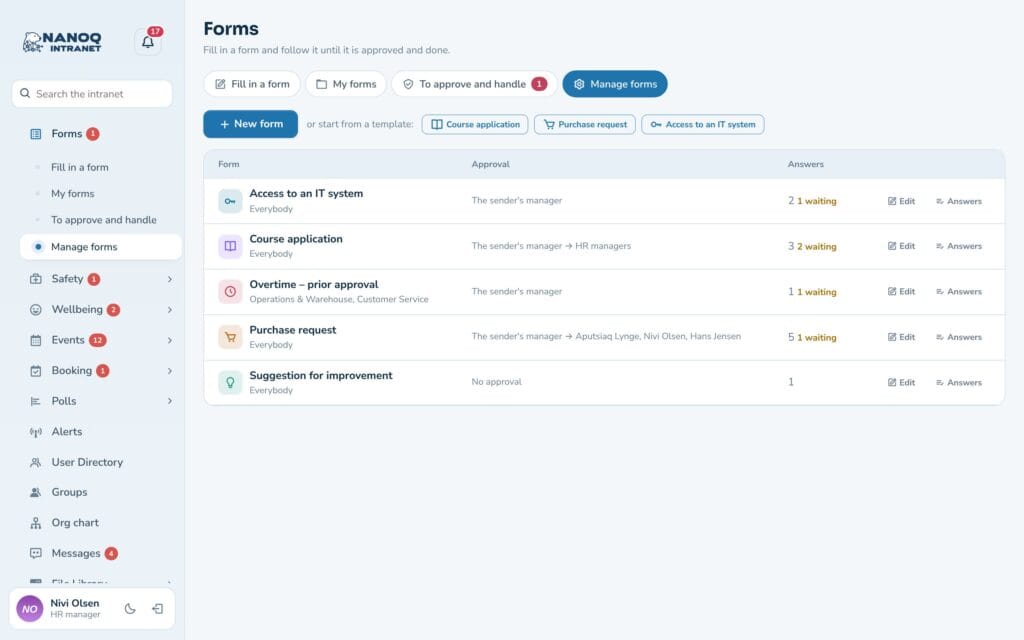
Administrators and the roles chosen in the settings see the Manage forms tab with all forms, their approval steps and the number of replies.
- Click New form – or start from a template: Course application, Purchase request or Access to an IT system.
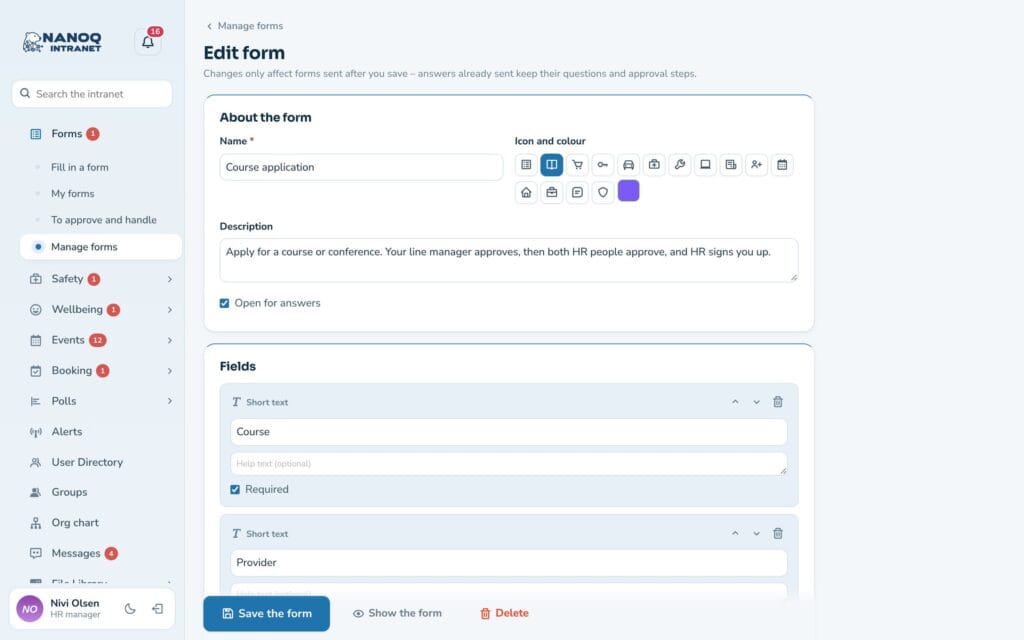
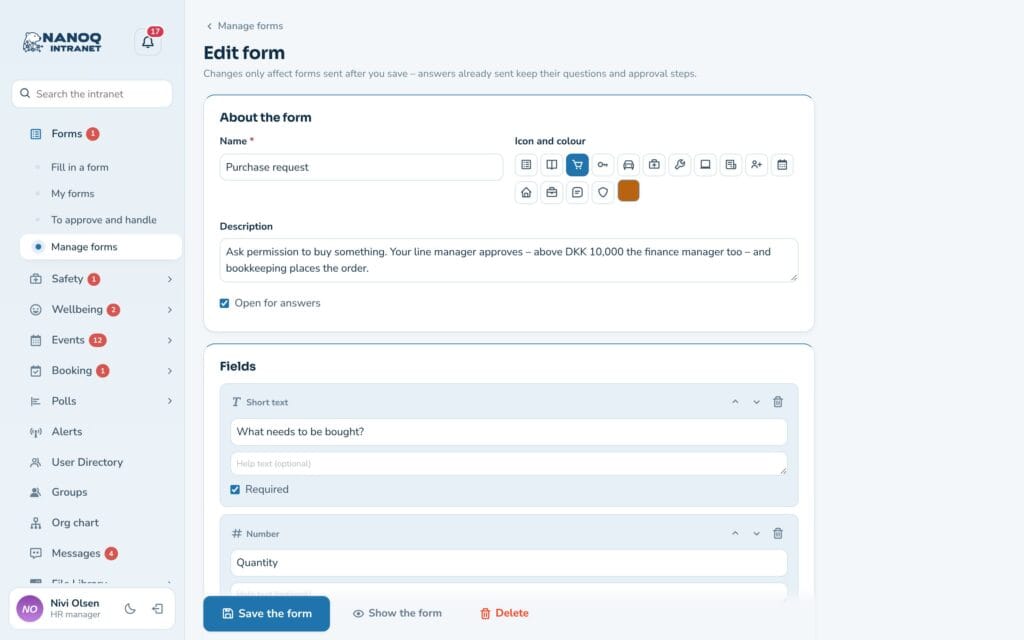
- Under About the form you write the name and description and choose an icon and colour. Open for answers decides whether the form can be filled in.
- Under Fields you add the fields: Heading and text, Short text, Long text, Number, Date, Drop-down list, One choice, Several choices, Yes/no, Email and File. Each field can have a help text and be required, and the arrows move it up and down.
- Under Who can fill it in you choose Everybody on the intranet or Only members of these groups.
- Click Save the form. Show the form shows it the way employees see it.
Changes only apply to forms sent after you have saved – replies that have already been sent keep their questions and steps. A form with replies is closed and archived instead of deleted.
Approval steps and recipients
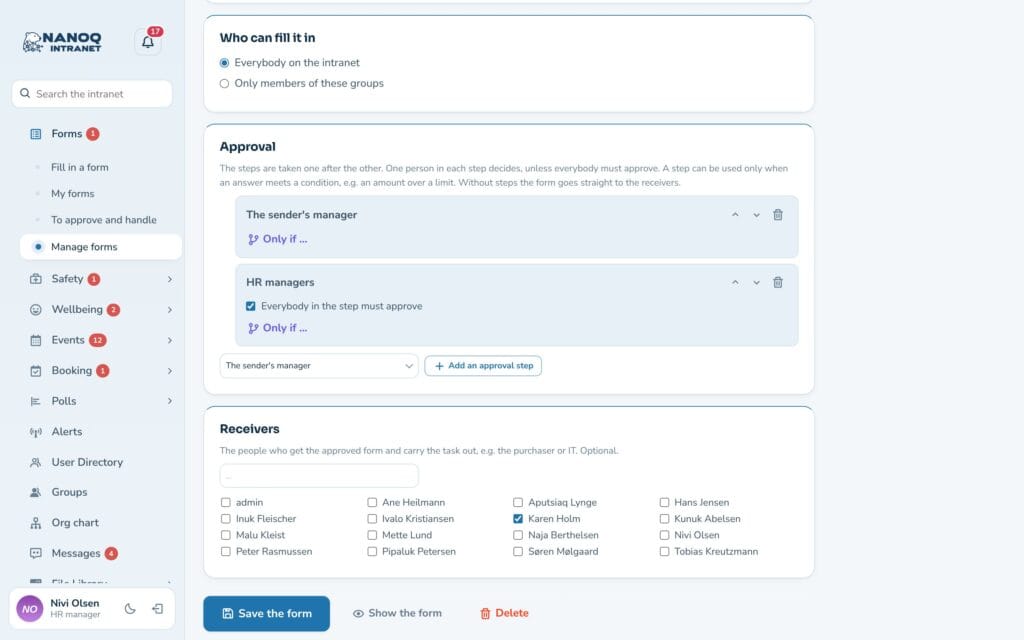
Under Approval you choose a step in the list and click Add an approval step. The steps are taken one after the other – or at the same time as the step before, when you tick At the same time as the step before:
- The sender’s manager – from the org chart, otherwise the leader of the sender’s department.
- HR managers – those marked as HR managers.
- Chosen people – the people you choose.
- The leaders of a group – for example IT or Finance.
If there is no approver in a step, the form goes to an administrator. Without steps the form goes directly to the recipients.
Under Receivers you choose the people who get the approved form and carry out the task. This is optional.
Conditions and Everybody must approve
A field or an approval step can apply on a condition:
- Fields: for example, only show the field “Why is it urgent?” when someone has answered yes to “Is it urgent?”.
- Steps: for example, let an extra step apply when the price is over DKK 10,000.
A step with chosen people can be set to Everybody must approve. Then the form only moves on when each of them has approved, and everyone can see in the history who is missing.
A condition has one part (no and/or), and file fields can’t be used as a condition.
Steps at the same time, and/or and Change the answer
- Steps at the same time: tick At the same time as the step before on an approval step, so it is sent at the same time as the step before – for example finance and IT at once. The form moves on when all the steps in the group have approved.
- And/or: a condition on a field or a step can have several rules that must all be met (and) or of which one is enough (or) – for example “amount over 10,000 or type is Laptop”.
- Change the answer: while the form is waiting for approval, the sender can click Change the answer. The approval starts again from the first step, and those who have already approved are notified.
All replies and Excel
Click Replies next to a form under Manage forms to see all replies to the form. The Excel button downloads them as a CSV file. Approvers and recipients can see the replies they have handled; those who may build forms can see all replies.
On the dashboard
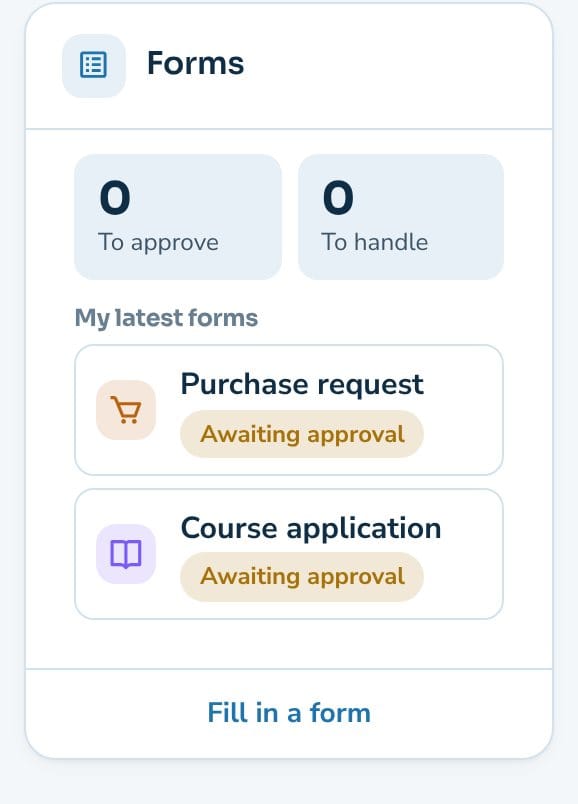
The Forms widget shows how many forms are waiting for you To approve and To handle, and your latest forms. The welcome banner has the Forms shortcut. If you have customised your dashboard before, you add the widget under Customize.
For administrators
Under Nanoq → Forms:
| Setting | What it does |
|---|---|
| Forms and approvals | Turns the module on and off (default: off) |
| Who may build forms | Roles that, in addition to administrators, may build forms and see all replies |
| Roles without access | Users with these roles cannot fill in or approve forms |
| Largest file (MB) | The largest file that can be attached to a form. The web server may have a lower limit |
- Forms are built and edited in the intranet – not in wp-admin.
- Attached files are stored in a protected folder and can only be downloaded by those who may see the reply.
- The intranet search also finds the forms, and all decisions are written to the activity log.
Good to know
- A half-finished form can be saved as a draft and sent later. A sent reply can be changed with Change the answer while it is waiting for approval – then the approval starts again. You can also withdraw it – or correct a rejected form – and send it again with Correct and send again.
- Fields and approval steps can be shown on a condition – for example a reason when something is urgent, or an extra step above an amount. A step can also require that all the chosen people approve.
- Approvers who leave a form waiting get a reminder.
- When an employee is anonymised (GDPR), their forms are anonymised too.