Guides › Communication
Emergency alerts
Send a message that everyone has to see right away – as a banner at the top of the screen, as push on the phone and optionally as email. Follow who has seen and acknowledged it.
What the module does
Emergency alerts are for what everyone needs to know right away: a power cut, a storm, a closed road or harbour, an IT outage or an evacuation.
- The alert appears as a banner at the top of every page of the intranet and pops up without anyone having to reload the page.
- It arrives as a pop-up and push on phone and computer – this can’t be turned off – and can also be sent as email.
- Three levels: Information, Warning and Critical.
- Title and text can be written in Danish, Greenlandic and English – each employee sees their own language.
- The sender can require acknowledgement and follow who has seen and acknowledged it.
The module is off until an administrator turns it on.
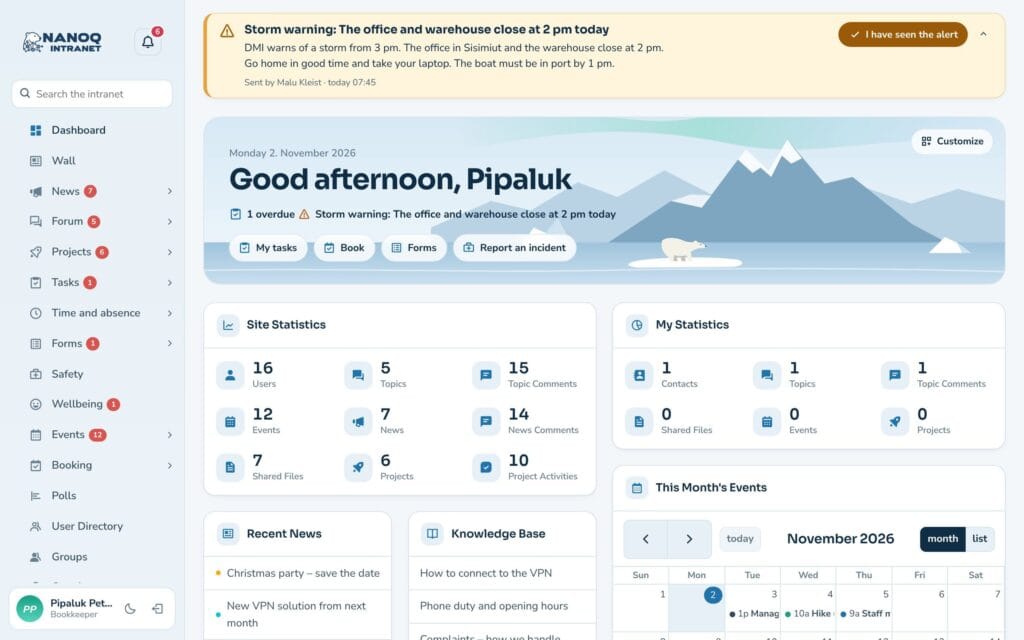
When you receive an alert
- The banner is shown at the top of the page in the level’s colour. You can collapse it with the arrow on the right. If there are three or more active alerts at once, they are collected in one line that can be expanded.
- If the alert requires acknowledgement, the banner has the button I have seen the alert. The banner stays until you have pressed it. Otherwise you can close it with the cross once you have read it.
- If the intranet is closed, you get a push notification on your phone or computer, if you have turned on push on the device. Alerts can’t be deselected under Notifications – the row is locked. Critical alerts stay on the screen until you touch them.
- Active alerts are also shown in the welcome banner and in the Alerts widget on the dashboard.
Tip: Turn on push on your phone under Settings → Notifications, so you get alerts even when the intranet is closed. See Notifications, push and app.
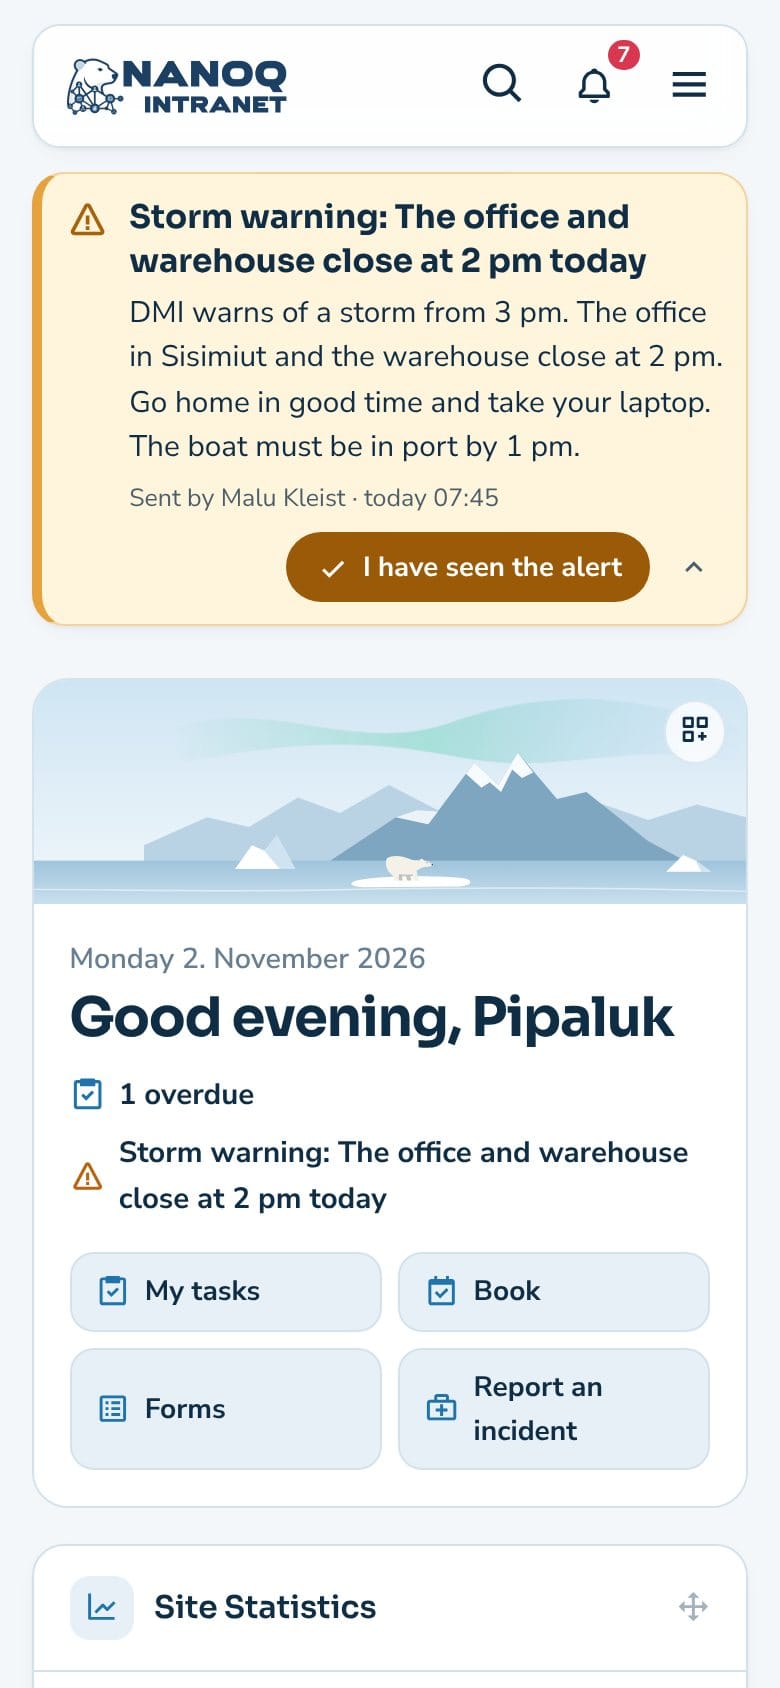
My alerts
Under Alerts → My alerts are all the alerts you have received – also the ones that have ended – with when you saw or confirmed them. Alerts can also be found in the search.
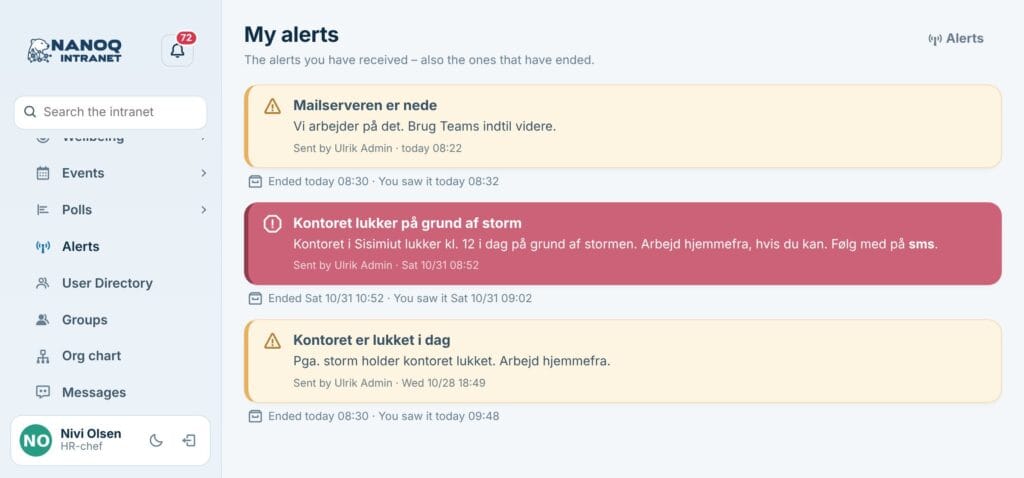
Send an alert
If you are allowed to send, you’ll find Alerts in the menu and the shortcut Send alert in the welcome banner. The New alert tab is open:
- Optionally choose a Template – then the title and text are filled in beforehand.
- Choose the Level: Information, Warning or Critical.
- Write the Title and Text. Under Written in you choose the language, and with Add Kalaallisut and Add Dansk you write translations.
- Choose Receivers: Everyone, Groups or Chosen people.
- Turn on Require acknowledgement if everyone has to confirm that they have seen the alert. Optionally turn on email and Show on the login page.
- Under Starts you choose Now or a Start time, and under When it is ended: Never – I end it myself, In a number of hours or At a certain time.
- Click Check before sending, see the number of receivers, and send.
On the right, What the receivers see shows how the banner and the push notification will look. The email is sent in each receiver’s own language.
Follow up and end
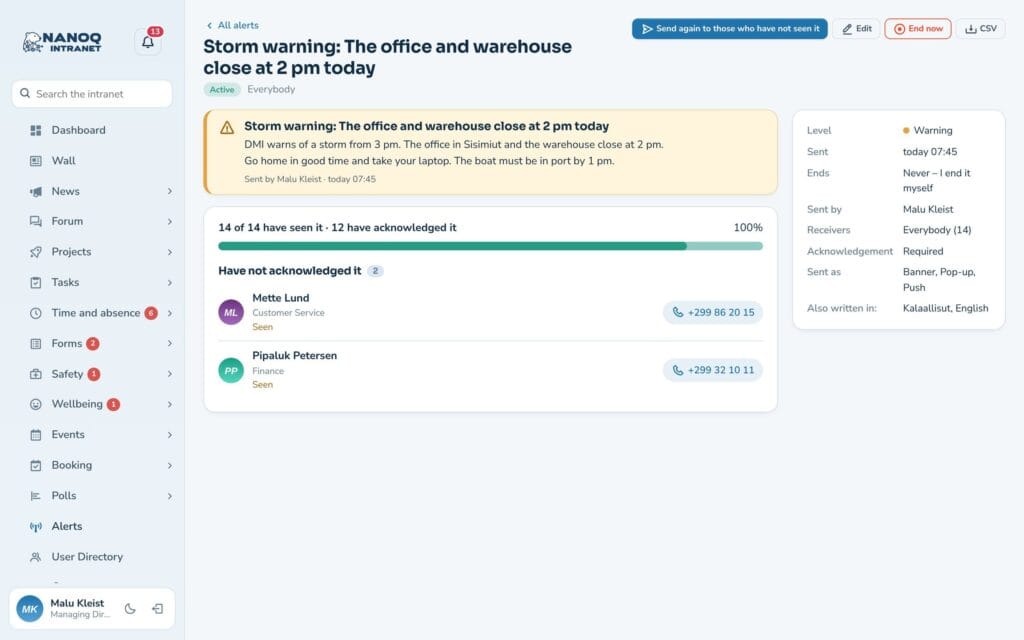
The Active, Scheduled and Ended tabs show your alerts. Click an alert to see its status: how many have seen it, how many have acknowledged it, and a list of those who are missing. An alert only counts as seen when the banner has actually been visible on the screen.
- Send again to those who have not seen it (at most every 10 minutes).
- Edit the title or text if the situation changes.
- End now removes the banner for everyone when the situation is over.
- CSV downloads the status list for Excel.
Administrators and HR managers can see employees’ phone numbers in the list, so they can call those who are missing.
Who may send?
- Administrators can always send.
- Senders and sender roles chosen by the administrator can send to everyone.
- Group leaders can, if it is turned on, send to their own groups.
This is checked on the server, so nobody can send without permission.
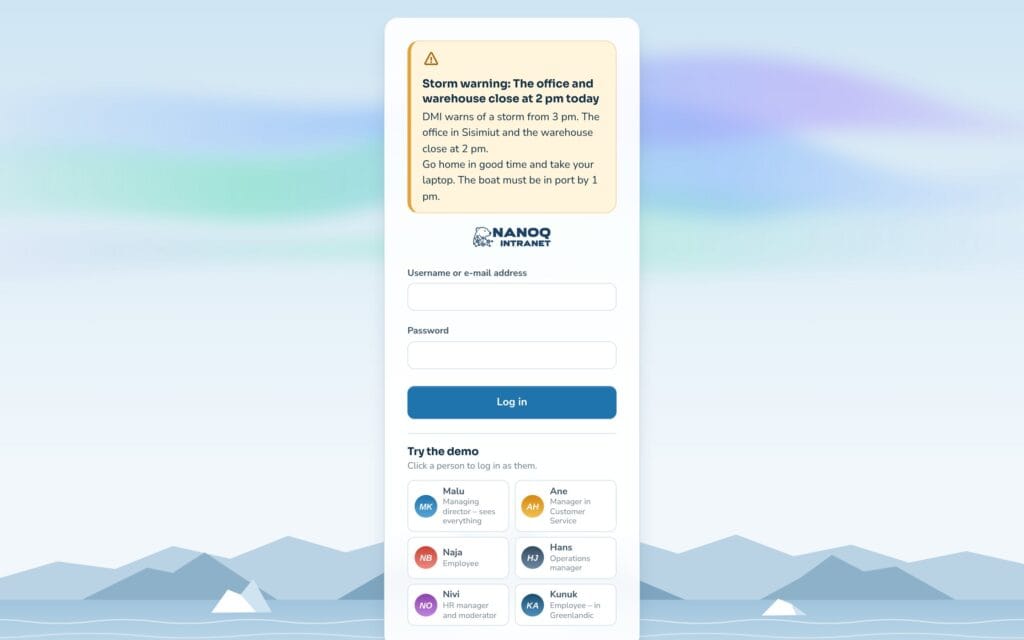
Show on the login page
If Show on the login page is turned on, the alert is also shown above the login box – for example “The intranet closes for an update at 4 pm”. It can be read by everyone, including people who are not logged in, so don’t put confidential information in it.
For administrators
Under Nanoq → Alerts:
| Setting | What it does |
|---|---|
| Alerts | Turns the module on and off (default: off) |
| Senders | Users who may send alerts to everyone, such as the receptionist or the IT manager |
| Sender roles | Users with these roles may send to everyone |
| Group leaders | Leaders of a Nanoq group may send to their own groups |
| Show on the login page | Lets the sender show an alert above the login box |
| Templates | One template per line: level | title | text (level = info, warning or critical) |
| Delete ended alerts after (days) | The alert and who has seen it are deleted (default 365, 0 = never) |
Good to know
- Push requires https, and each person must have turned on push on their device.
- The banner appears within about 45 seconds for those who have the intranet open.
- If an employee has neither the intranet open nor push turned on, the alert is seen the next time the intranet is opened – choose email as well if it is urgent for everyone.
- Try the module out with an Information-level alert to a small group before you need it.
- Alerts can be found in search – it opens the alert under My alerts.
- When an employee is anonymised (GDPR), their acknowledgements are deleted.